
Last spring I received a call from a homeowner in Virginia who thought he had termites. When I arrived, I found something even more common but just as destructive — a large carpenter ant colony living inside the exterior wall near the kitchen. The ants had already hollowed out several wooden studs. The repair bill ended up close to $4,800.
That case stuck with me because most of the damage could have been prevented if the homeowner had known what to look for and how to act early.
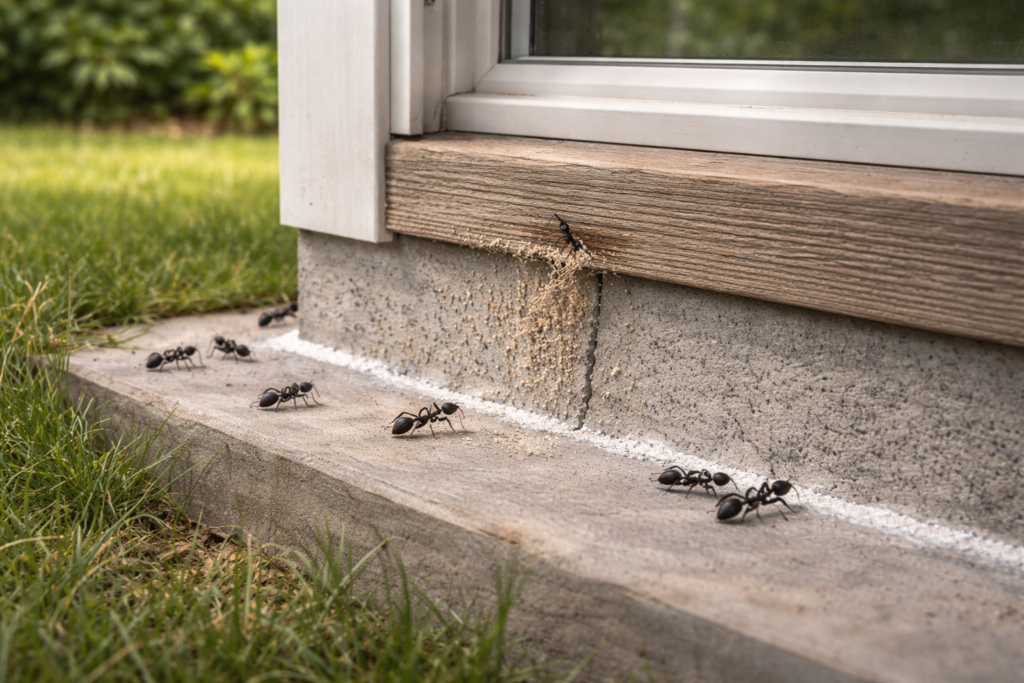
Carpenter ants in walls are particularly dangerous because they often go unnoticed until the wood starts to feel soft or you hear faint rustling sounds at night. By then, the colony is usually well established.
Here’s what I’ve learned from inspecting hundreds of homes with carpenter ant problems: prevention is far easier and cheaper than repair.
Early Warning Signs of Carpenter Ants in Walls
From my experience, these are the most reliable signs that carpenter ants have moved into your walls:
- Small piles of coarse sawdust (frass) that looks like pencil shavings near baseboards or windows
- Faint rustling or tapping sounds inside walls, especially at night
- Large black or reddish-black ants (½ inch long) appearing indoors, especially near windows or moist areas
- Hollow-sounding wood when you tap on baseboards or door frames
- Ant trails along foundation or exterior walls leading toward the house
If you notice any of these, it’s time to act immediately.
My Most Effective Strategy to Prevent Carpenter Ants in Walls
After dealing with this problem for many years, I developed a practical prevention system that focuses on three main goals: removing what attracts them, blocking entry points, and destroying small colonies before they grow.
1. Eliminate Moisture Sources (The #1 Attractant)
Carpenter ants are drawn to damp wood. In my inspections, I’ve found that over 70% of wall infestations start near areas with moisture issues.
What to do:
- Fix all leaks around pipes, roofs, gutters, and windows immediately
- Improve ventilation in bathrooms, kitchens, and basements
- Direct downspouts away from the foundation
- Replace any water-damaged wood as soon as possible
Disclosure: As an Amazon Associate, we earn from qualifying purchases.
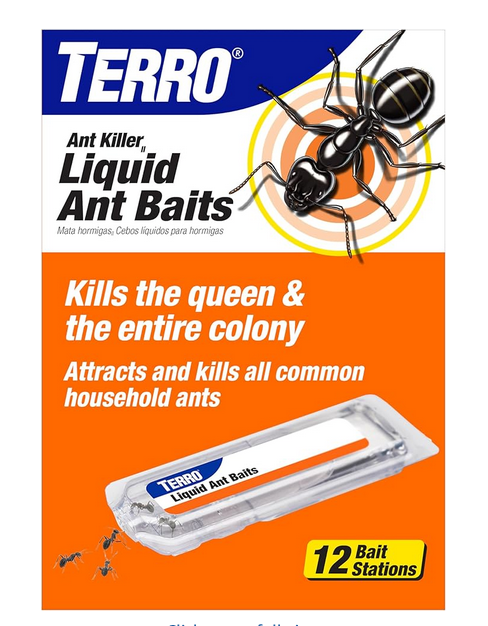
Stop Carpenter Ants Before Wall Damage Starts
These indoor ant bait stations help target hidden colonies inside walls, baseboards, and damp wood areas before damage spreads.
Check Price on Amazon2. Seal All Possible Entry Points
Even tiny cracks are enough for scout ants to enter.
Focus on:
- Cracks where siding meets the foundation
- Gaps around windows, doors, and utility lines
- Holes left by previous pests or poor construction
- Areas where tree branches touch the house (trim them back at least 2 feet)
I always recommend using both caulk for small gaps and expanding foam + caulk for larger openings.
3. Remove Food Sources and Nesting Material
Carpenter ants don’t eat wood — they excavate it to build nests. But they do need protein and sugar.
Practical steps:
- Keep food in airtight containers
- Clean up crumbs and spills immediately
- Store firewood at least 20 feet from the house and off the ground
- Remove dead trees, stumps, and old lumber near the foundation
4. Create a Natural Barrier Around Your Home
I’ve had great success with a combination of diatomaceous earth and peppermint oil spray around the perimeter.
Apply food-grade diatomaceous earth in a thin line along the foundation. Spray a peppermint oil solution (20 drops per cup of water) on exterior walls and window frames every 7–10 days during spring and summer.
5. Regular Monitoring and Early Treatment
Every spring I advise homeowners to do a quick “ant audit”:
- Walk around the exterior of the house looking for frass and trails
- Tap on suspicious wood to check for hollow sounds
- Place a few borax-based bait stations near potential entry points
If you catch a small satellite colony early, you can often stop it before it reaches the main nest inside the walls.
Comparison Table: Effectiveness of Natural Ant Prevention Methods
| Method | Effectiveness | Speed of Results | Safety for Kids & Pets | Cost | Best Used For | My Rating |
|---|---|---|---|---|---|---|
| Borax + Sugar Bait | Excellent | 7–14 days | Good (keep away) | Very Low | Killing the whole colony | 10/10 |
| Diatomaceous Earth Barrier | Very Good | 3–7 days | Excellent | Low | Creating a physical barrier | 9/10 |
| Vinegar + Peppermint Spray | Good | Immediate | Excellent | Very Low | Destroying pheromone trails | 8/10 |
| Cinnamon + Clove Powder | Good | 2–4 days | Excellent | Very Low | Pleasant-smelling barrier | 7/10 |
| Sealing Cracks | Excellent | Immediate | Excellent | Medium | Long-term prevention | 10/10 |
| Lemon Peel + Juice | Good | Immediate | Excellent | Very Low | Windowsills & doors | 7/10 |
| Peppermint Oil Spray | Very Good | 1–2 days | Excellent | Low | Strong repellent | 8/10 |
| Strict Sanitation | Excellent | Ongoing | Excellent | Free | Supporting all other methods | 9/10 |
What I’ve Learned After 20 Years
The biggest mistake I see homeowners make is waiting until they see large numbers of ants indoors. By that point, the colony is usually deep inside the walls and much harder (and more expensive) to eliminate.
The second mistake is relying only on sprays. Sprays kill the ants you see, but they don’t reach the queen and larvae hidden inside the walls.
Consistent prevention and early action are what actually protect your home long-term.
Have you found any signs of carpenter ants in your walls this year? What have you tried so far?
Share your experience in the comments — I read every one and often update these guides based on real situations from homeowners like you.

Welcome to my pest control blog! I’m Dave Saunders, a seasoned pest management specialist with over 20 years of experience helping homeowners and businesses across the United States. My journey began in the sunny landscapes of California, where I honed my skills tackling a wide range of pests, from ants to spiders. Over the years, I’ve expanded my expertise to Florida and numerous other states, adapting to diverse climates and pest challenges.
With a deep passion for eco-friendly solutions, I’ve dedicated my career to providing practical, safe, and effective pest control methods. Whether it’s crafting natural repellents or sharing integrated pest management strategies, my goal is to empower you with the knowledge to maintain a pest-free home. Join me as I share insights from two decades in the field!